Overcoming NAT
Do I need this?
Only if you booked a VM without a dedicated IPV4 (NAT) on p2pcloud.
Using Cloudflare tunnels
Create a tunnel
Cloudflare is a fast and free way to expose your web service without having a dedicated IPV4.
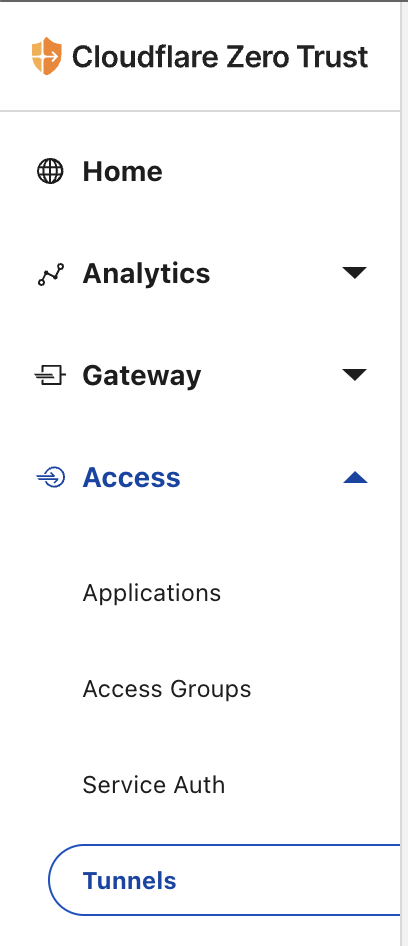
Open https://one.dash.cloudflare.com/. Login or register. Then Navigate Acess->Tunnels.
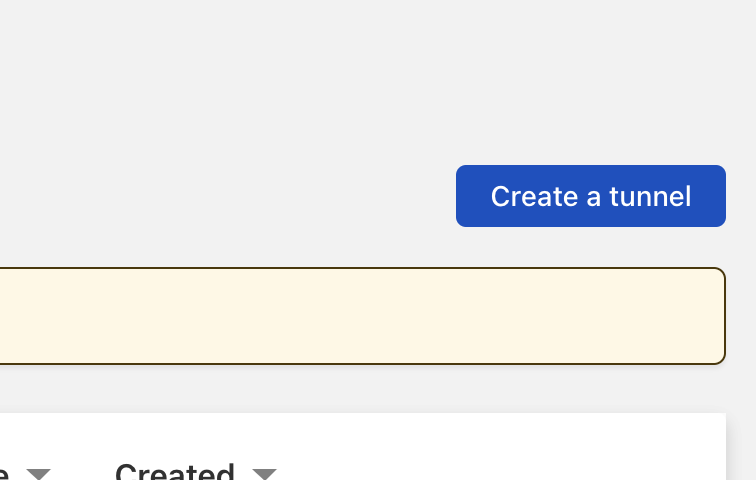
Click “Create tunnel”
Name it

Launch the tunnel on your VM
Select docker and copy your launch command

If you don’t have docker installed, just type apt update && apt install -y docker.io.
Copy your launch command, and add --net=host -d --name cloudflared right after docker run. You will have something like that:
|
|
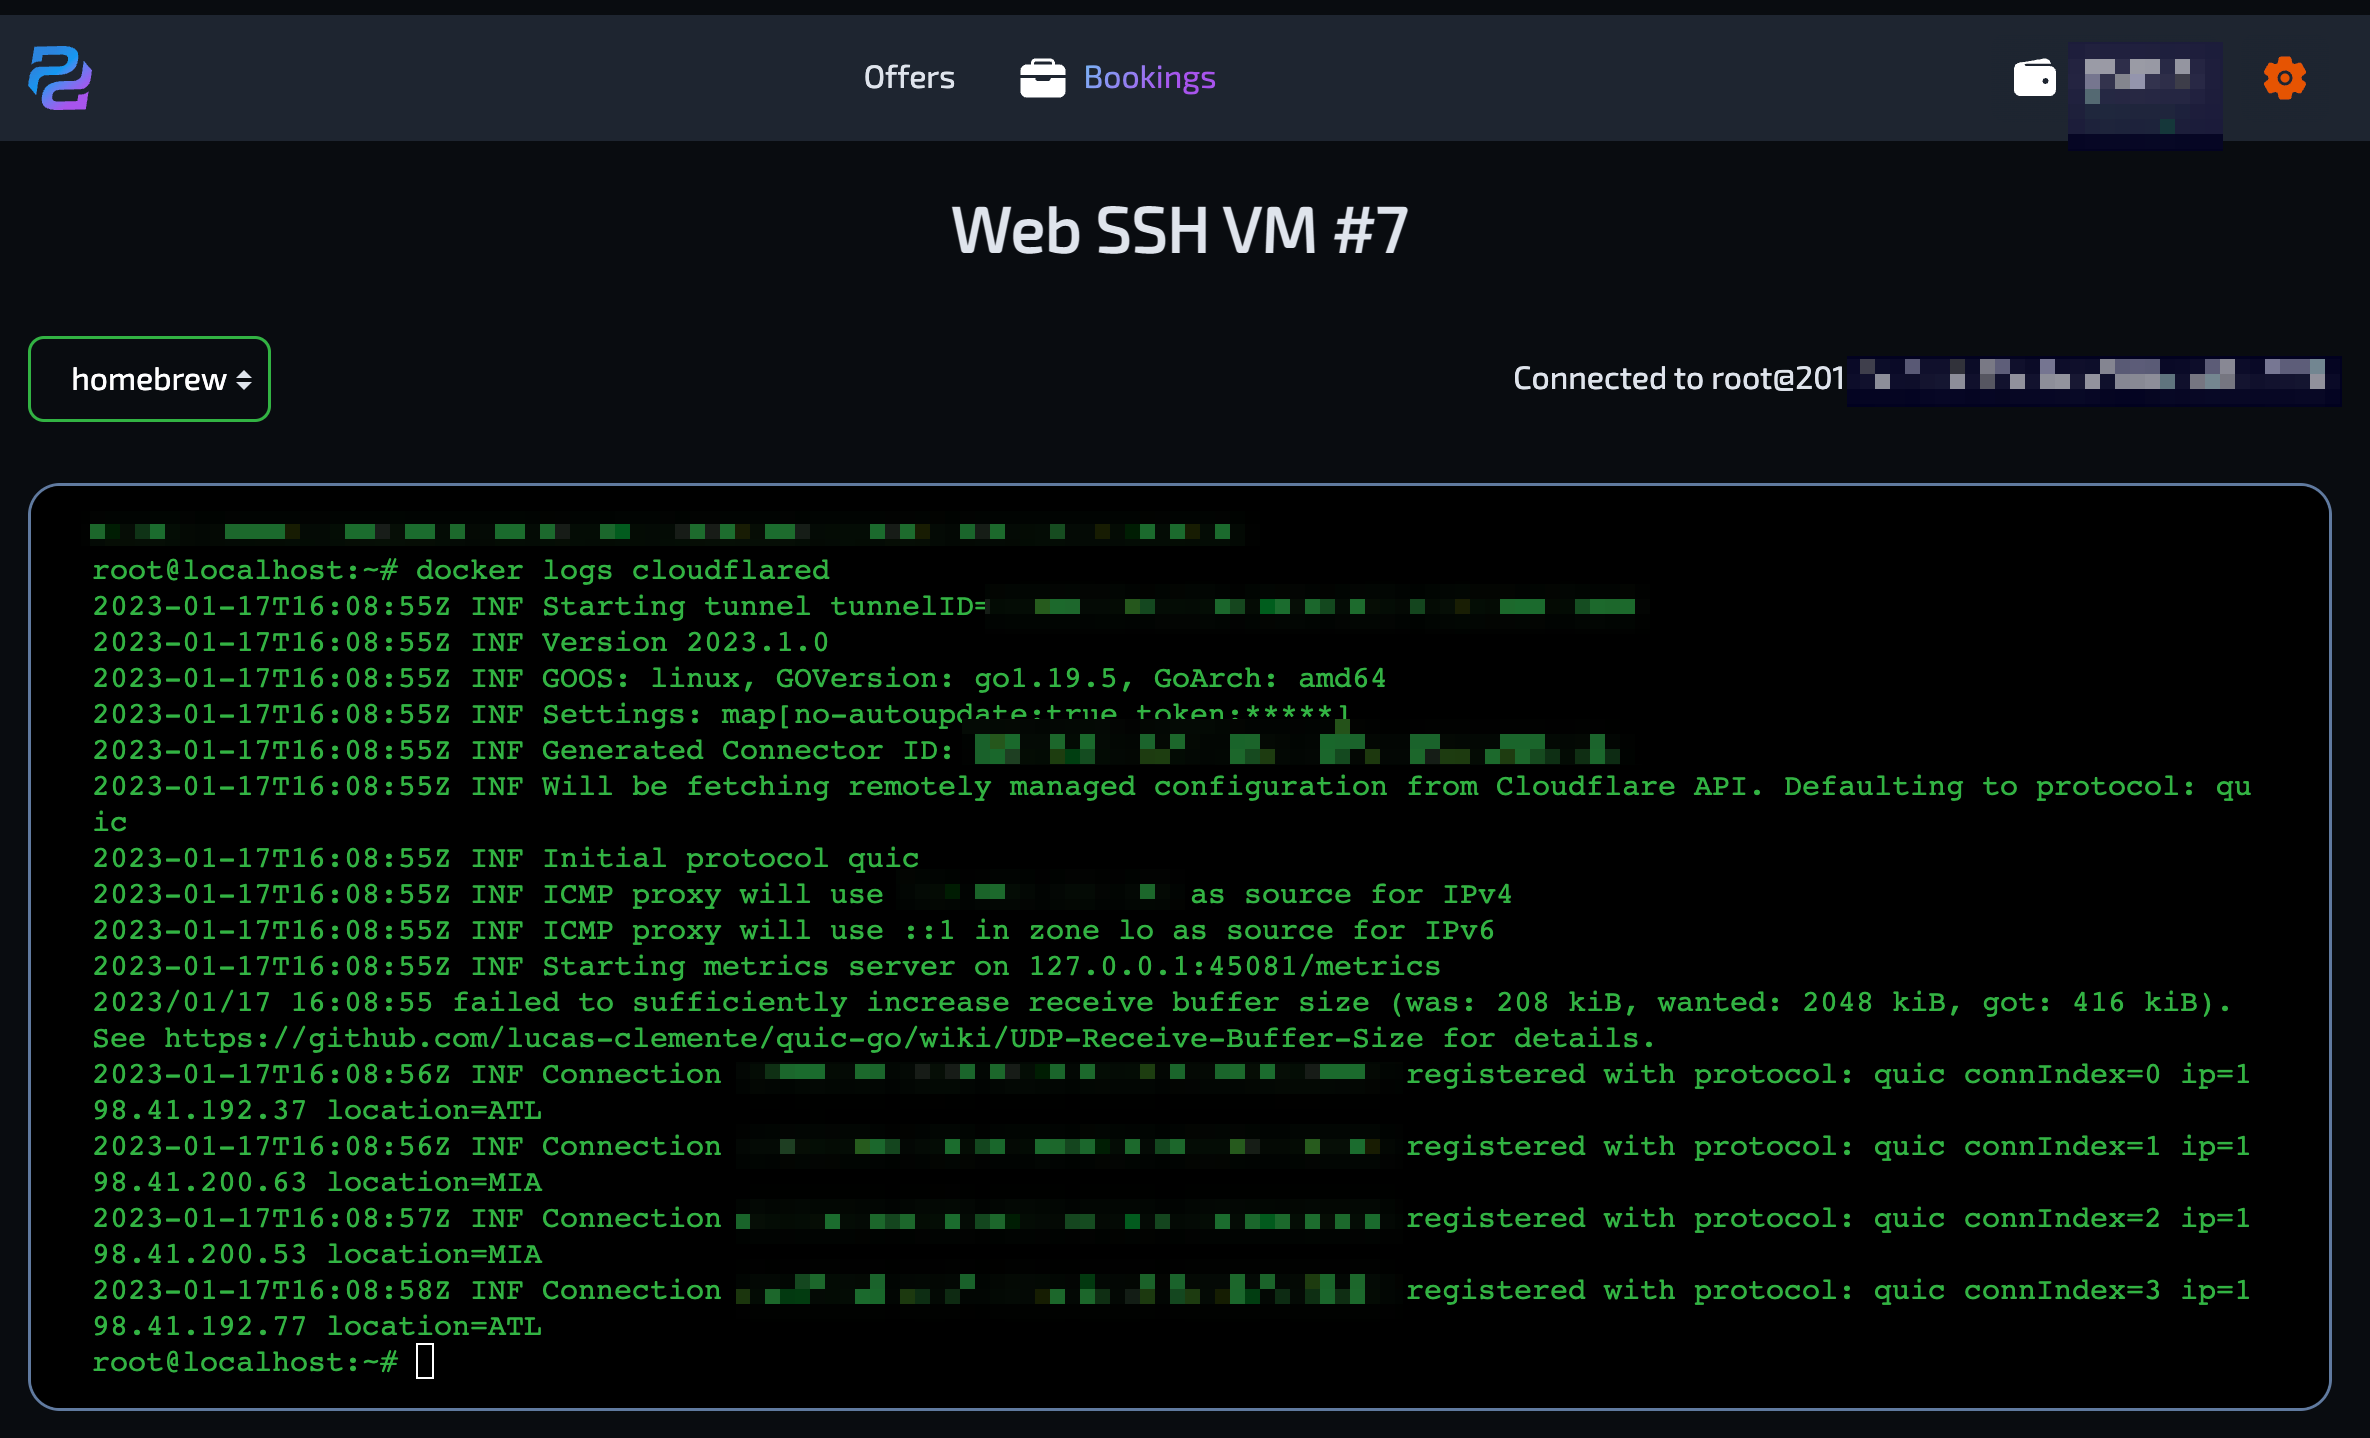
Check logs
|
|
It should report successful connections
Launch example service
|
|
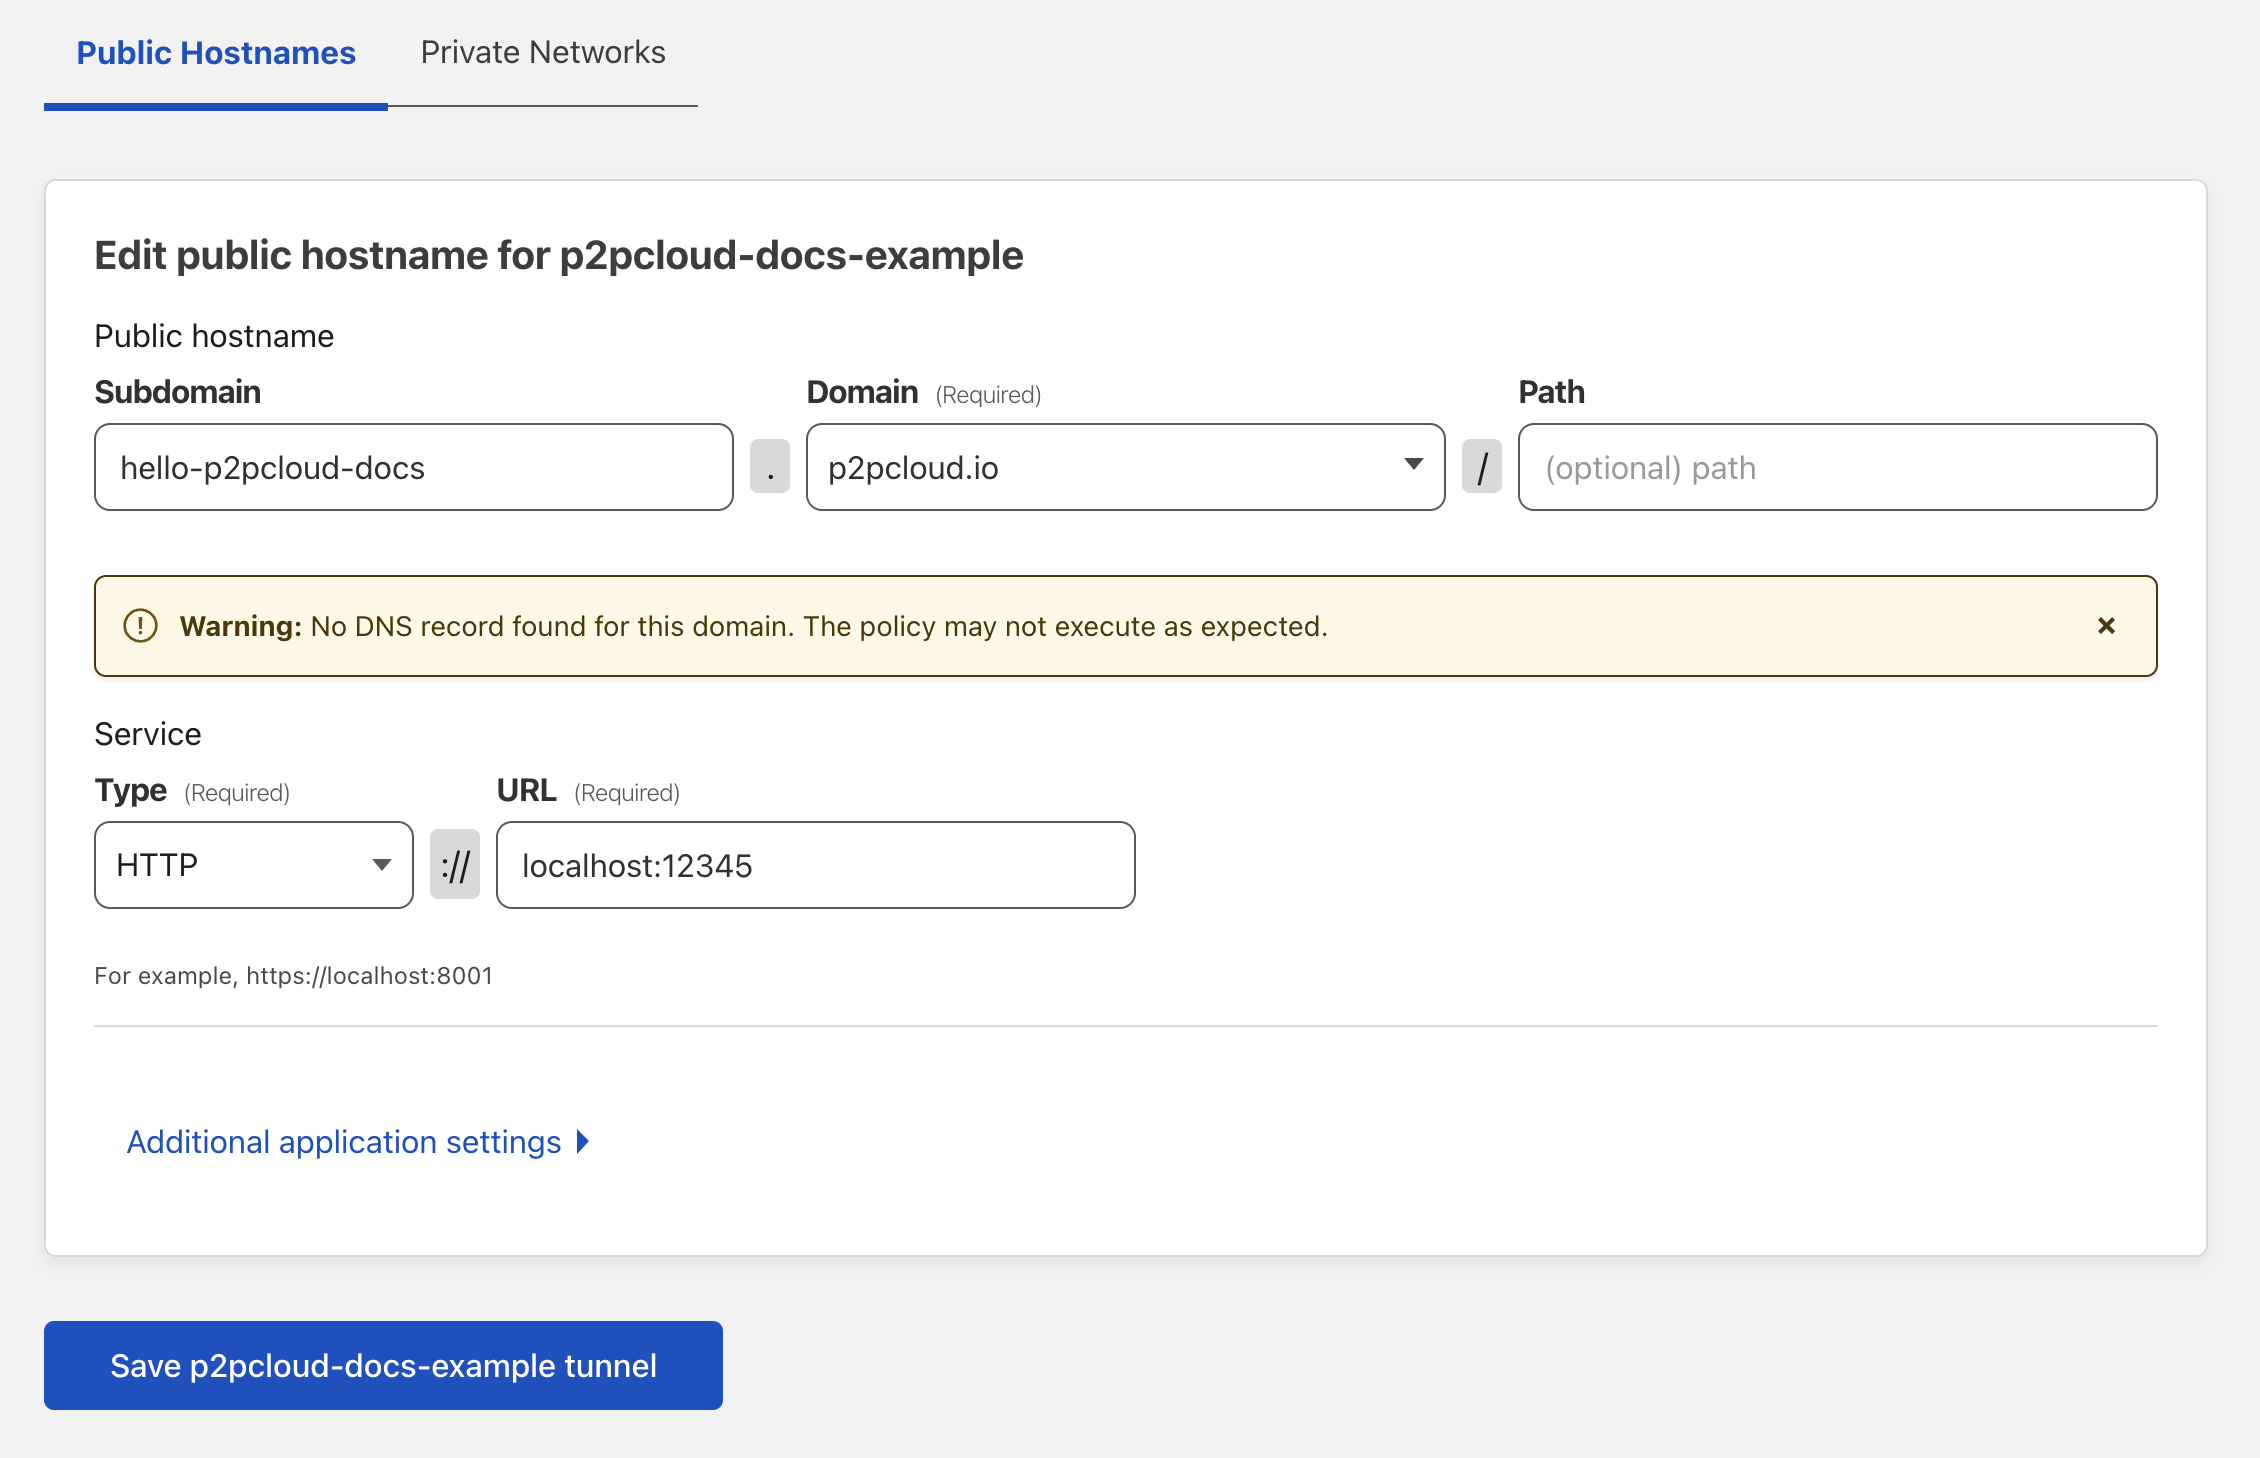
Connect the service to your domain on Cloudflare
Click “next” and use any subdomain you want. Use 127.0.0.1:12345 as an endpoint, that’s where your container example listening.
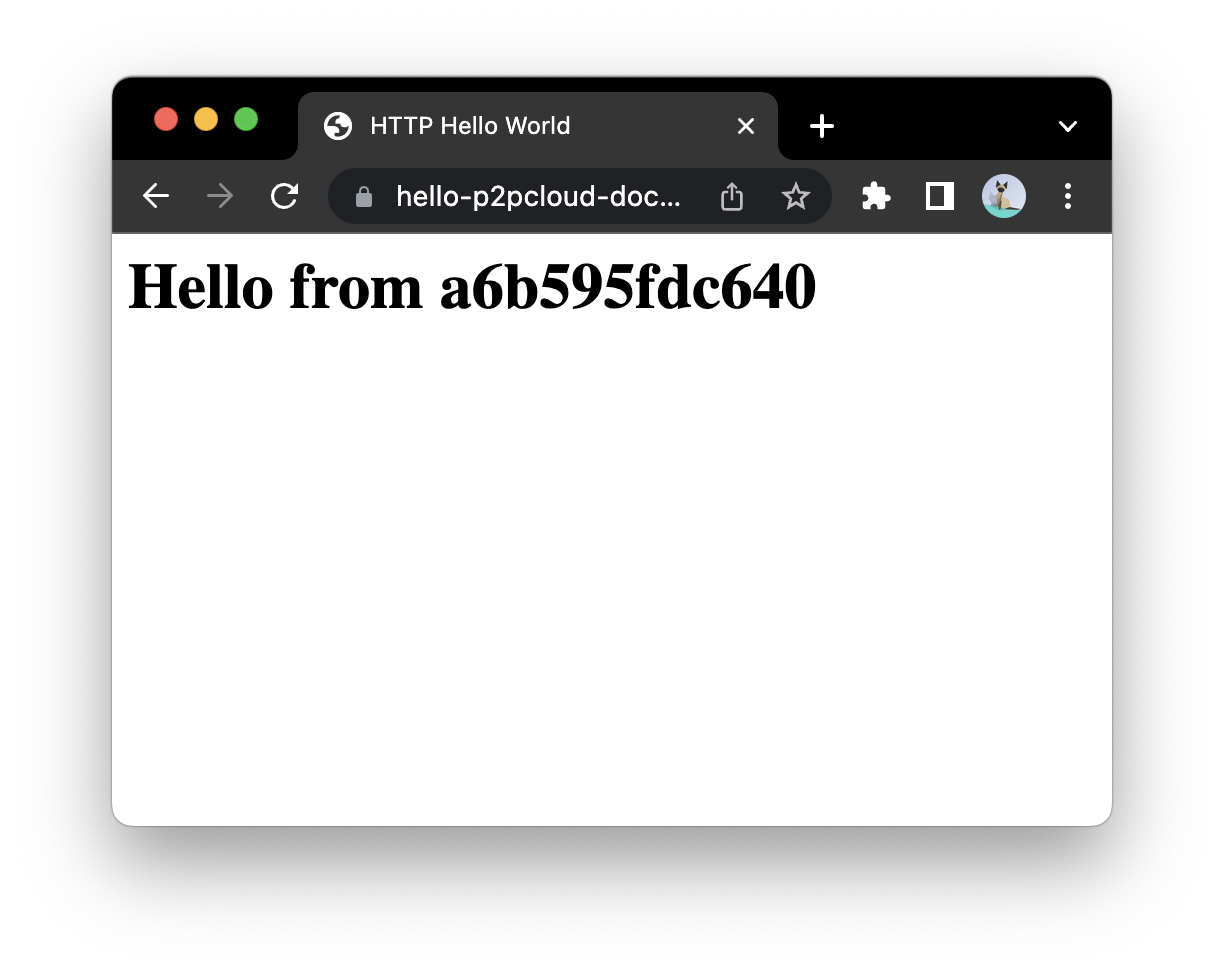
That’s it! Here is your app served on cloudflare without any port forwarding or dedicated IPs:
Optional: Load balancing and high availability
You can run the same 2 containers app and cloudflared on another VM and get round-robin load balancing and high availability.
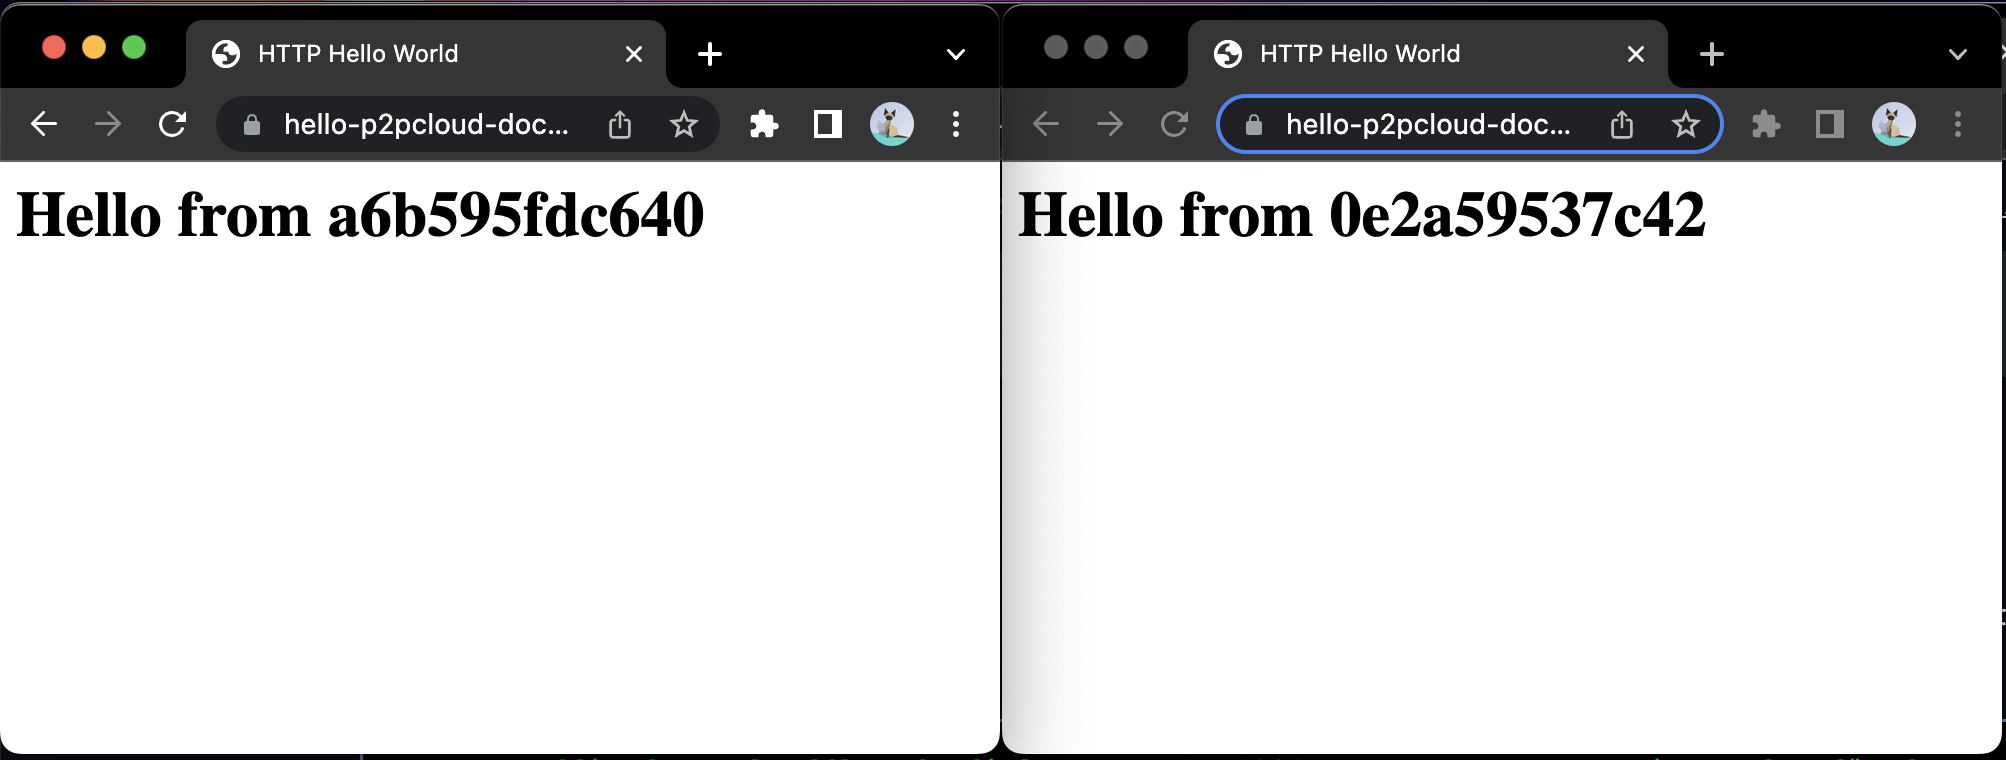
Try restarting cloudflared on both servers if load balancing is not working right away.