Developer Quick Start
Before You Start:
Before using the marketplace to book and manage a VM, you must have Metamask installed and configured on your computer.
1. Fund The Account
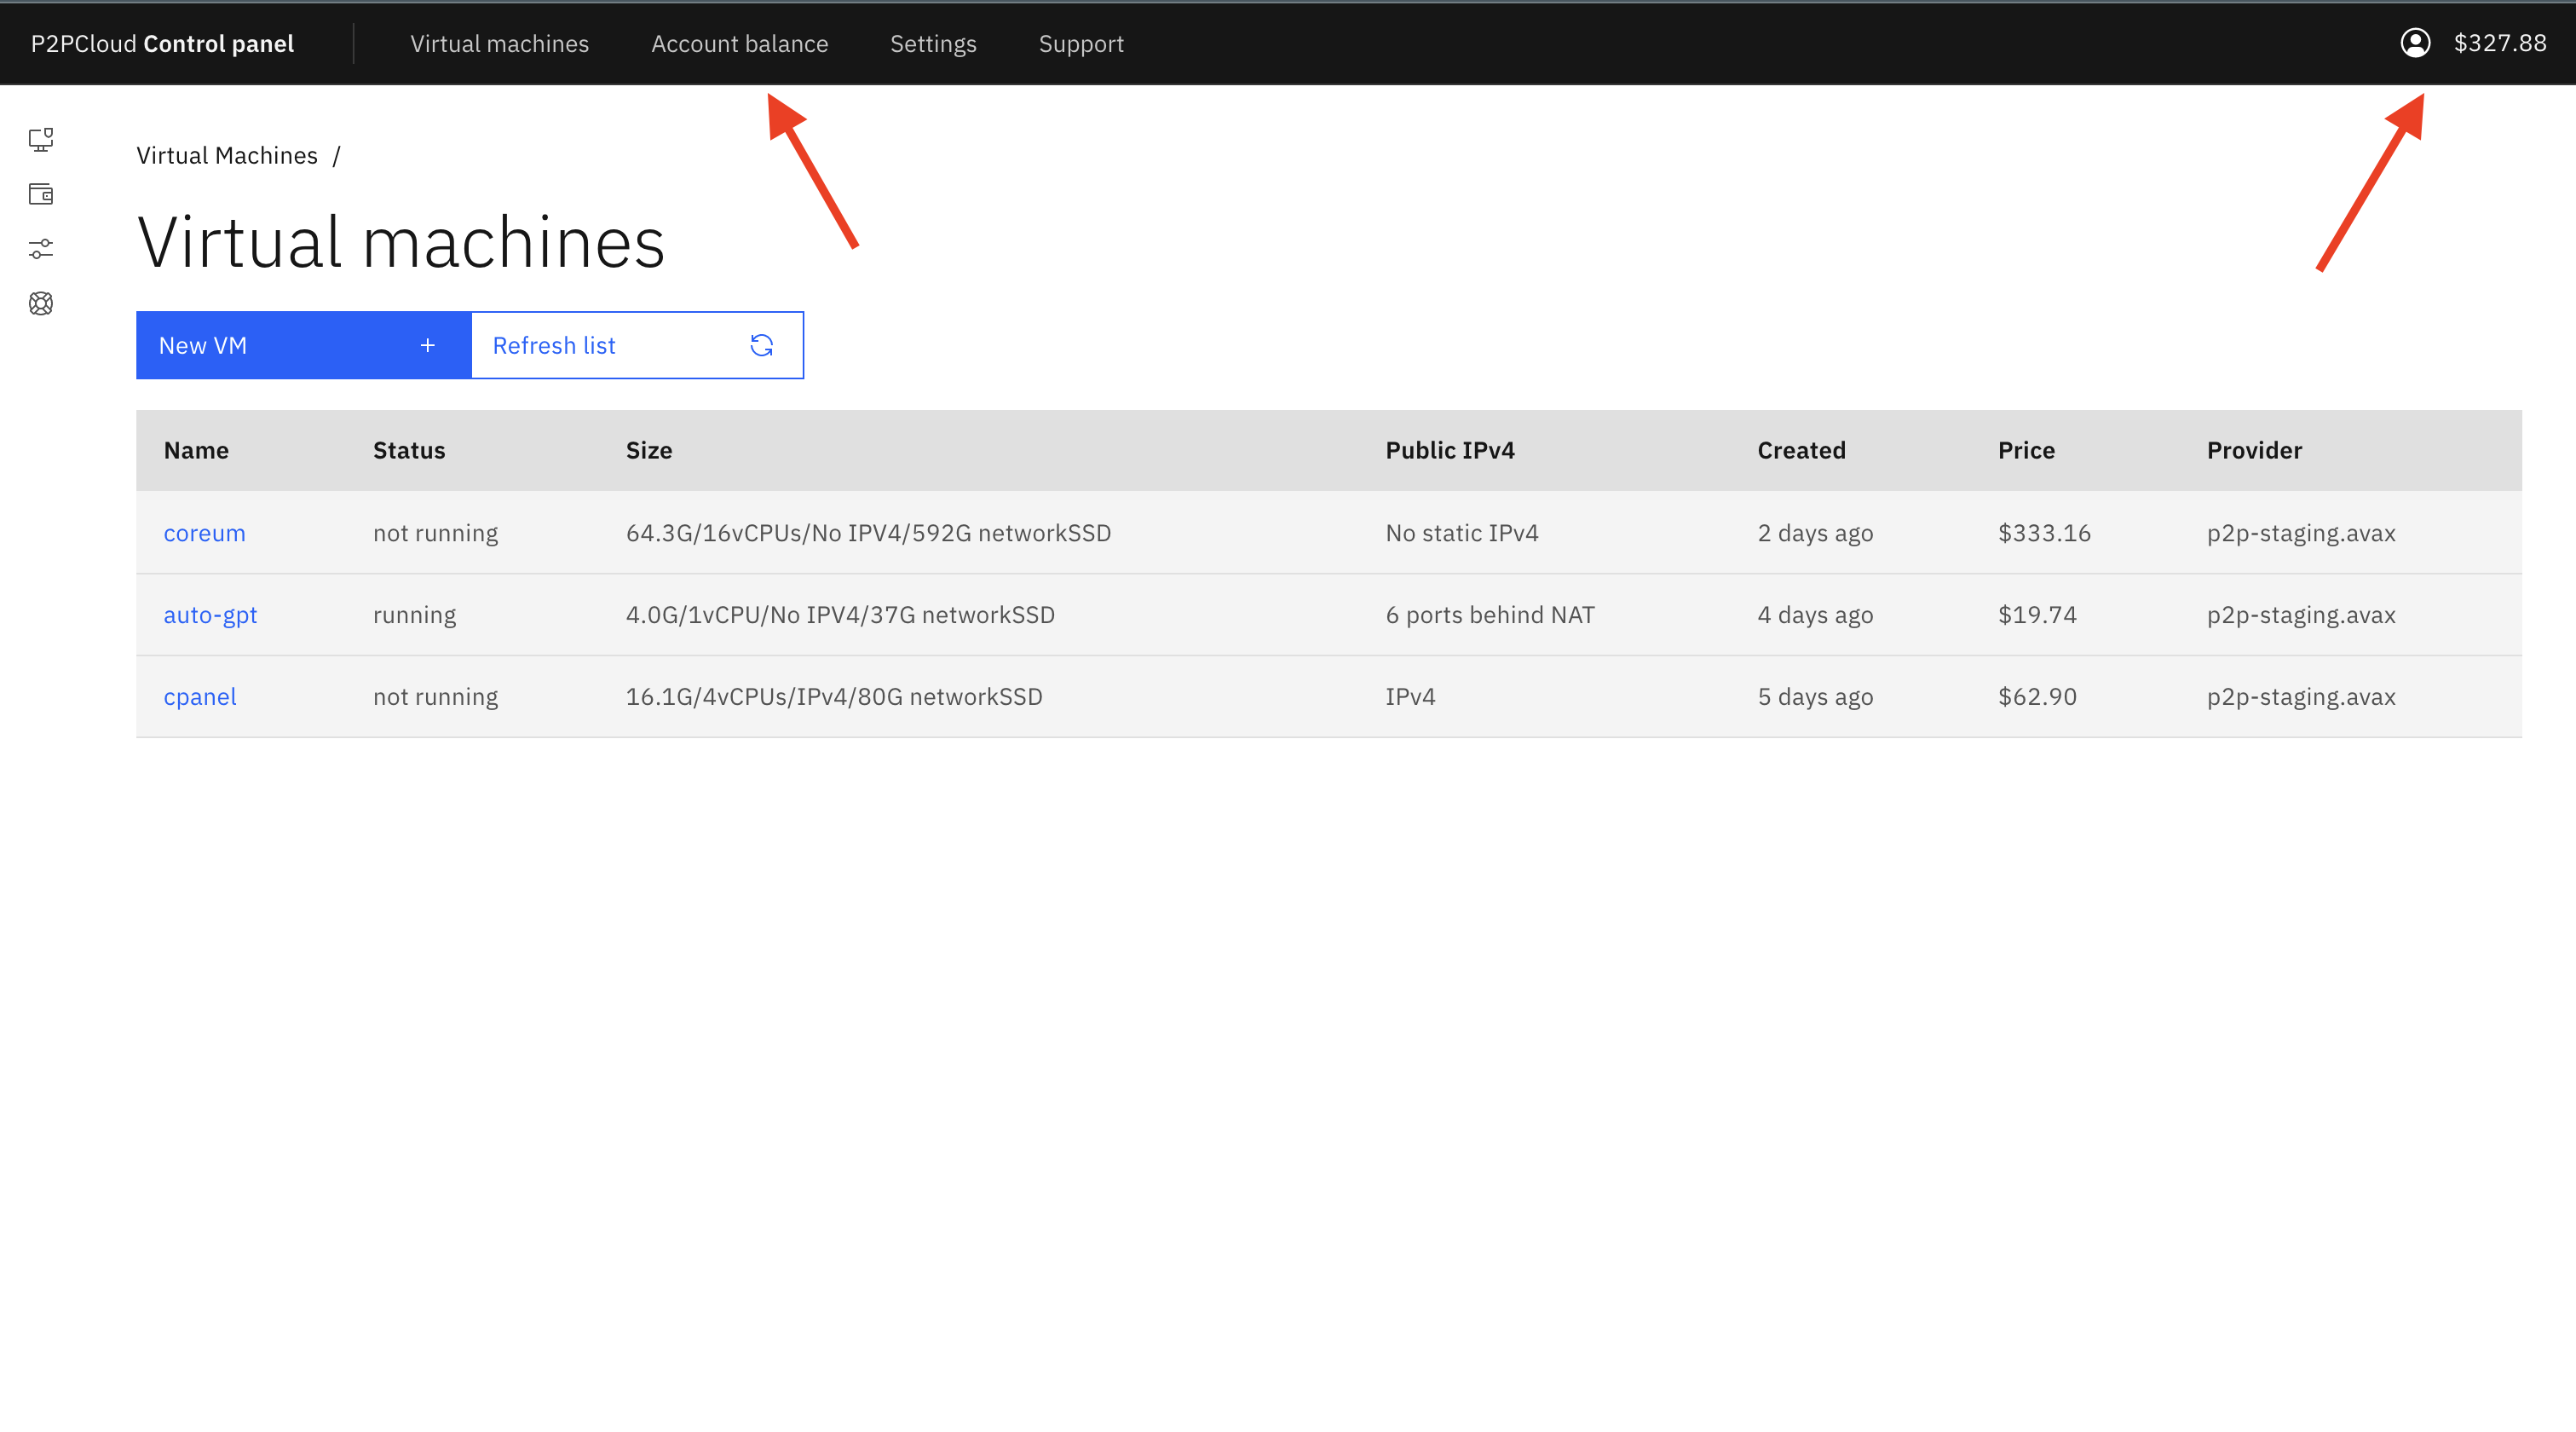
To book a VM through the marketplace, you will need to add funds to your account through our integrated 3rd party payment processor Stripe. To add funds, navigate to Account Balance, where you will see Add funds with credit card, or click on your profile in the top right and click on Add Funds.
Next, you will be directed to the stripe payment portal where you will enter in your credit card information.
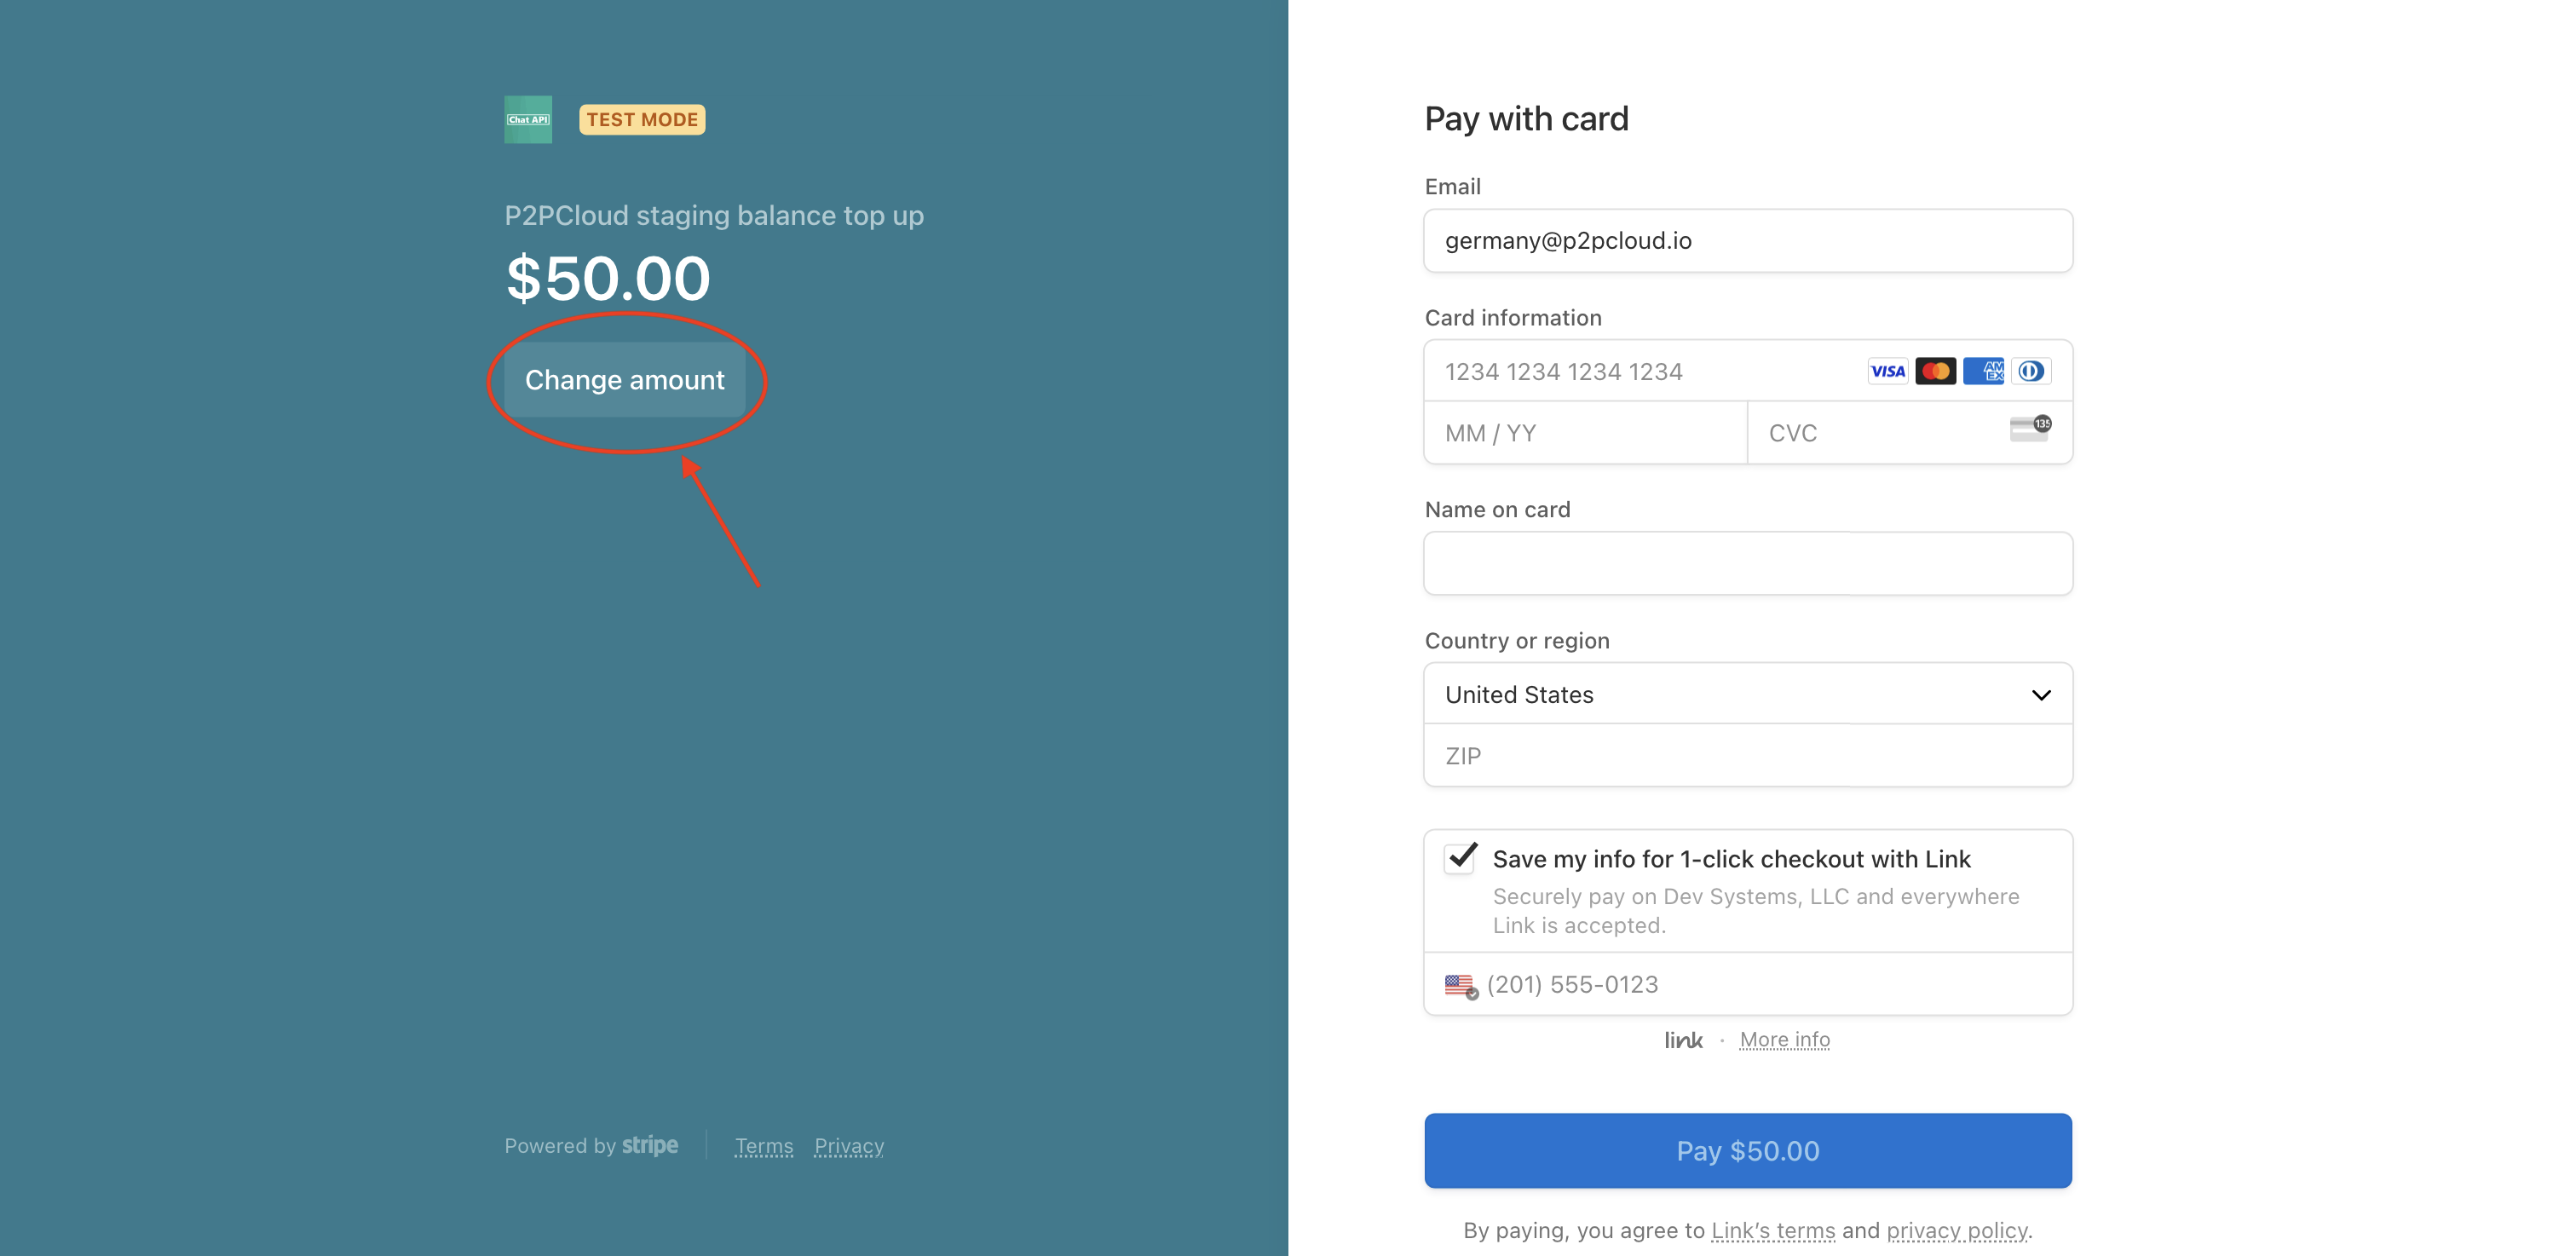
Note: To change the payment amount, click “Change Amount”.
After your payment has been processed, close out of the stripe page and head over to the virtual machine page.
Note: If you don’t see the balance displaying on the top right, simply refresh the page and it should appear.
2. Book a VM on P2P Cloud
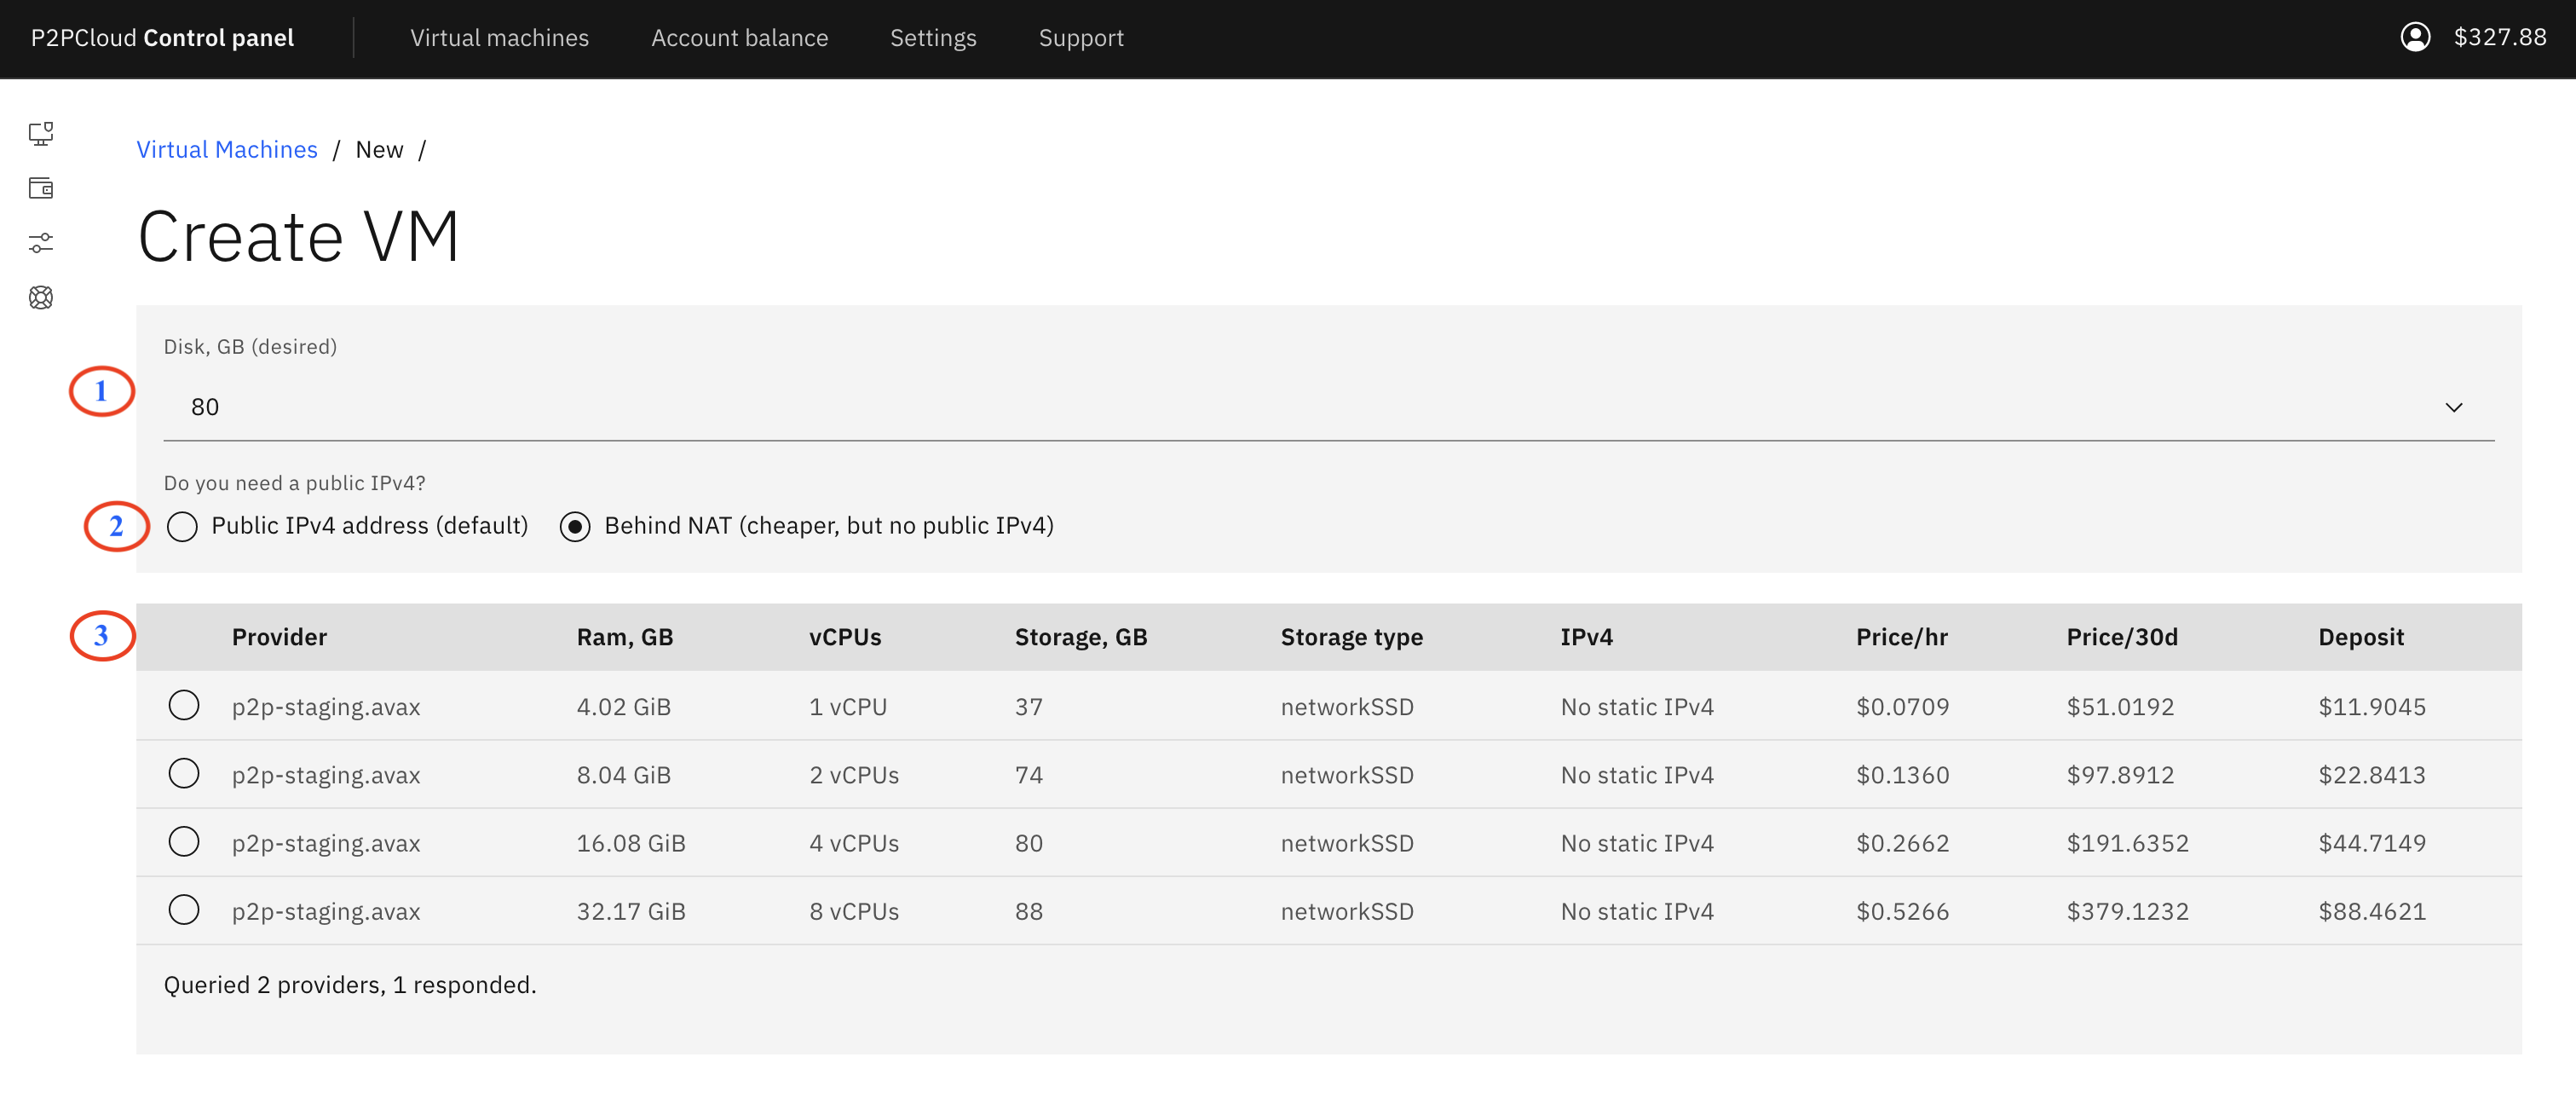
On the Virtual machine page, click "+ New VM" and you will see a list of VMs currently available.
The page is broken down as follows:
- Desired Disk: The minimum disk size for your instance
- Network Configuration: Choose between IPv4 and Network Address Translation(NAT)
- Provider List: Providers filtered using the specs mentioned in the last two points
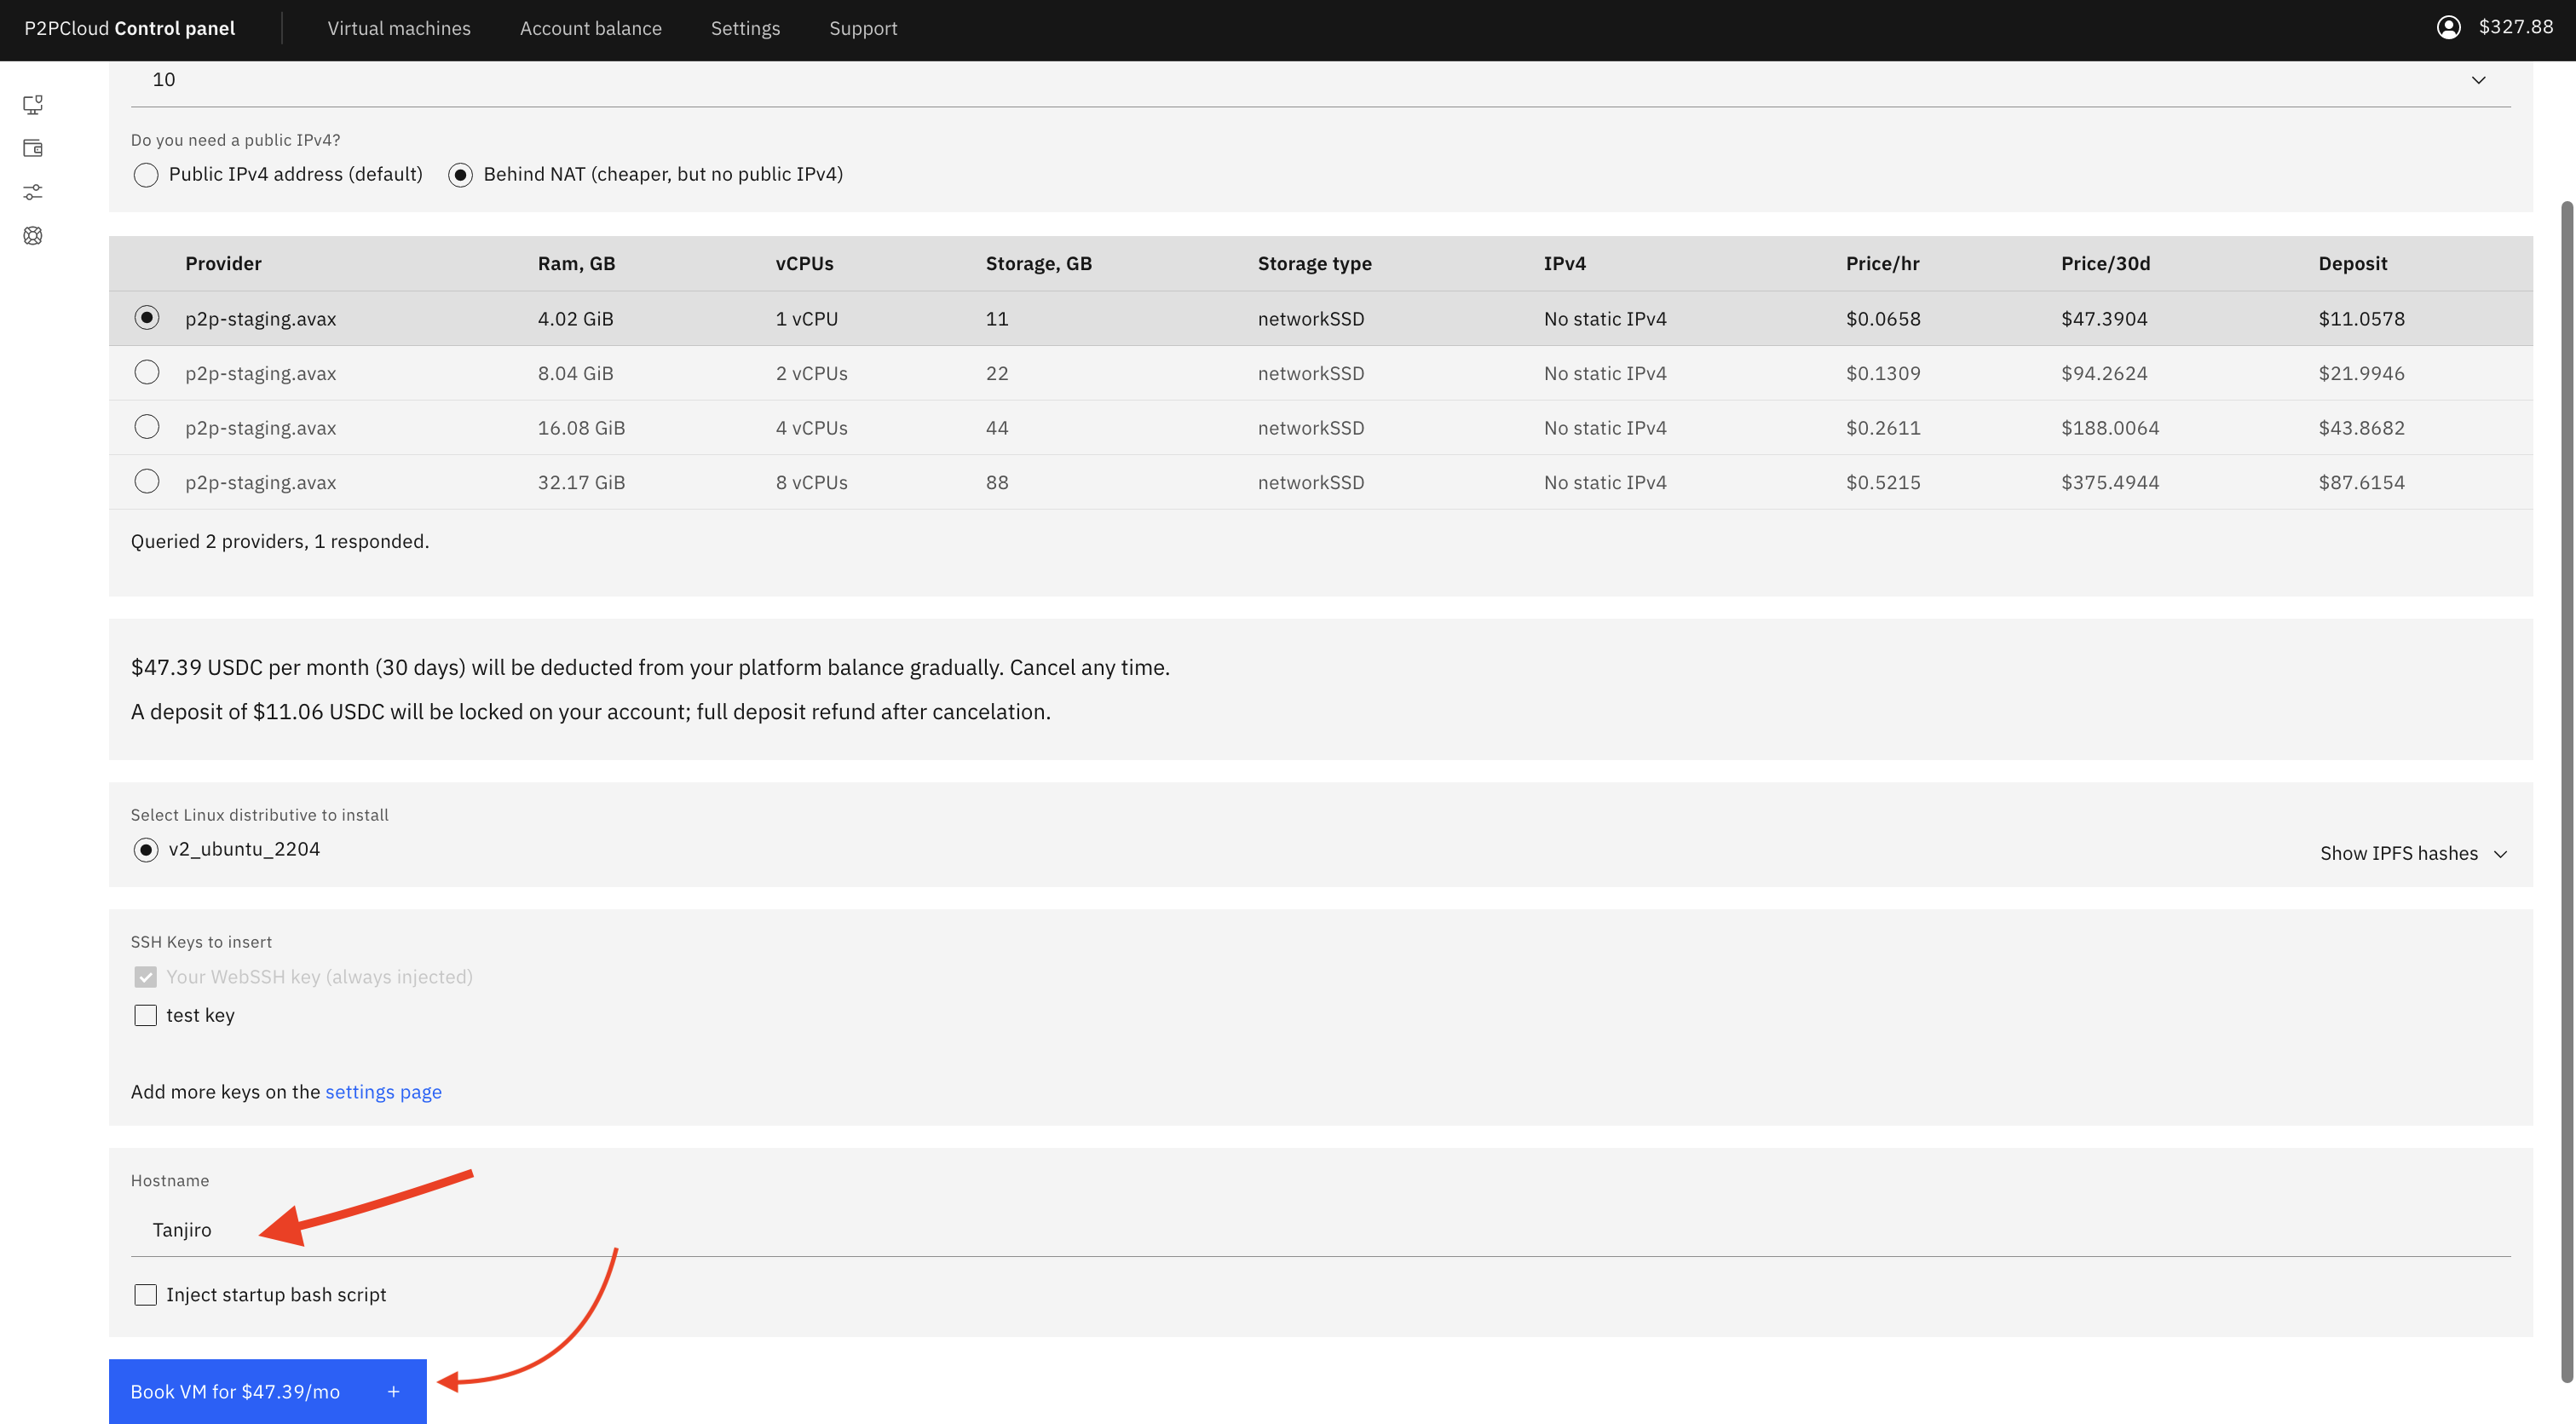
Note: Do not close the window or refresh the screen when initializing the attestation process.
3. Launch It
After your VM finished the attestation process, you will be directed to the webSSH console where you can start building in your new VM!
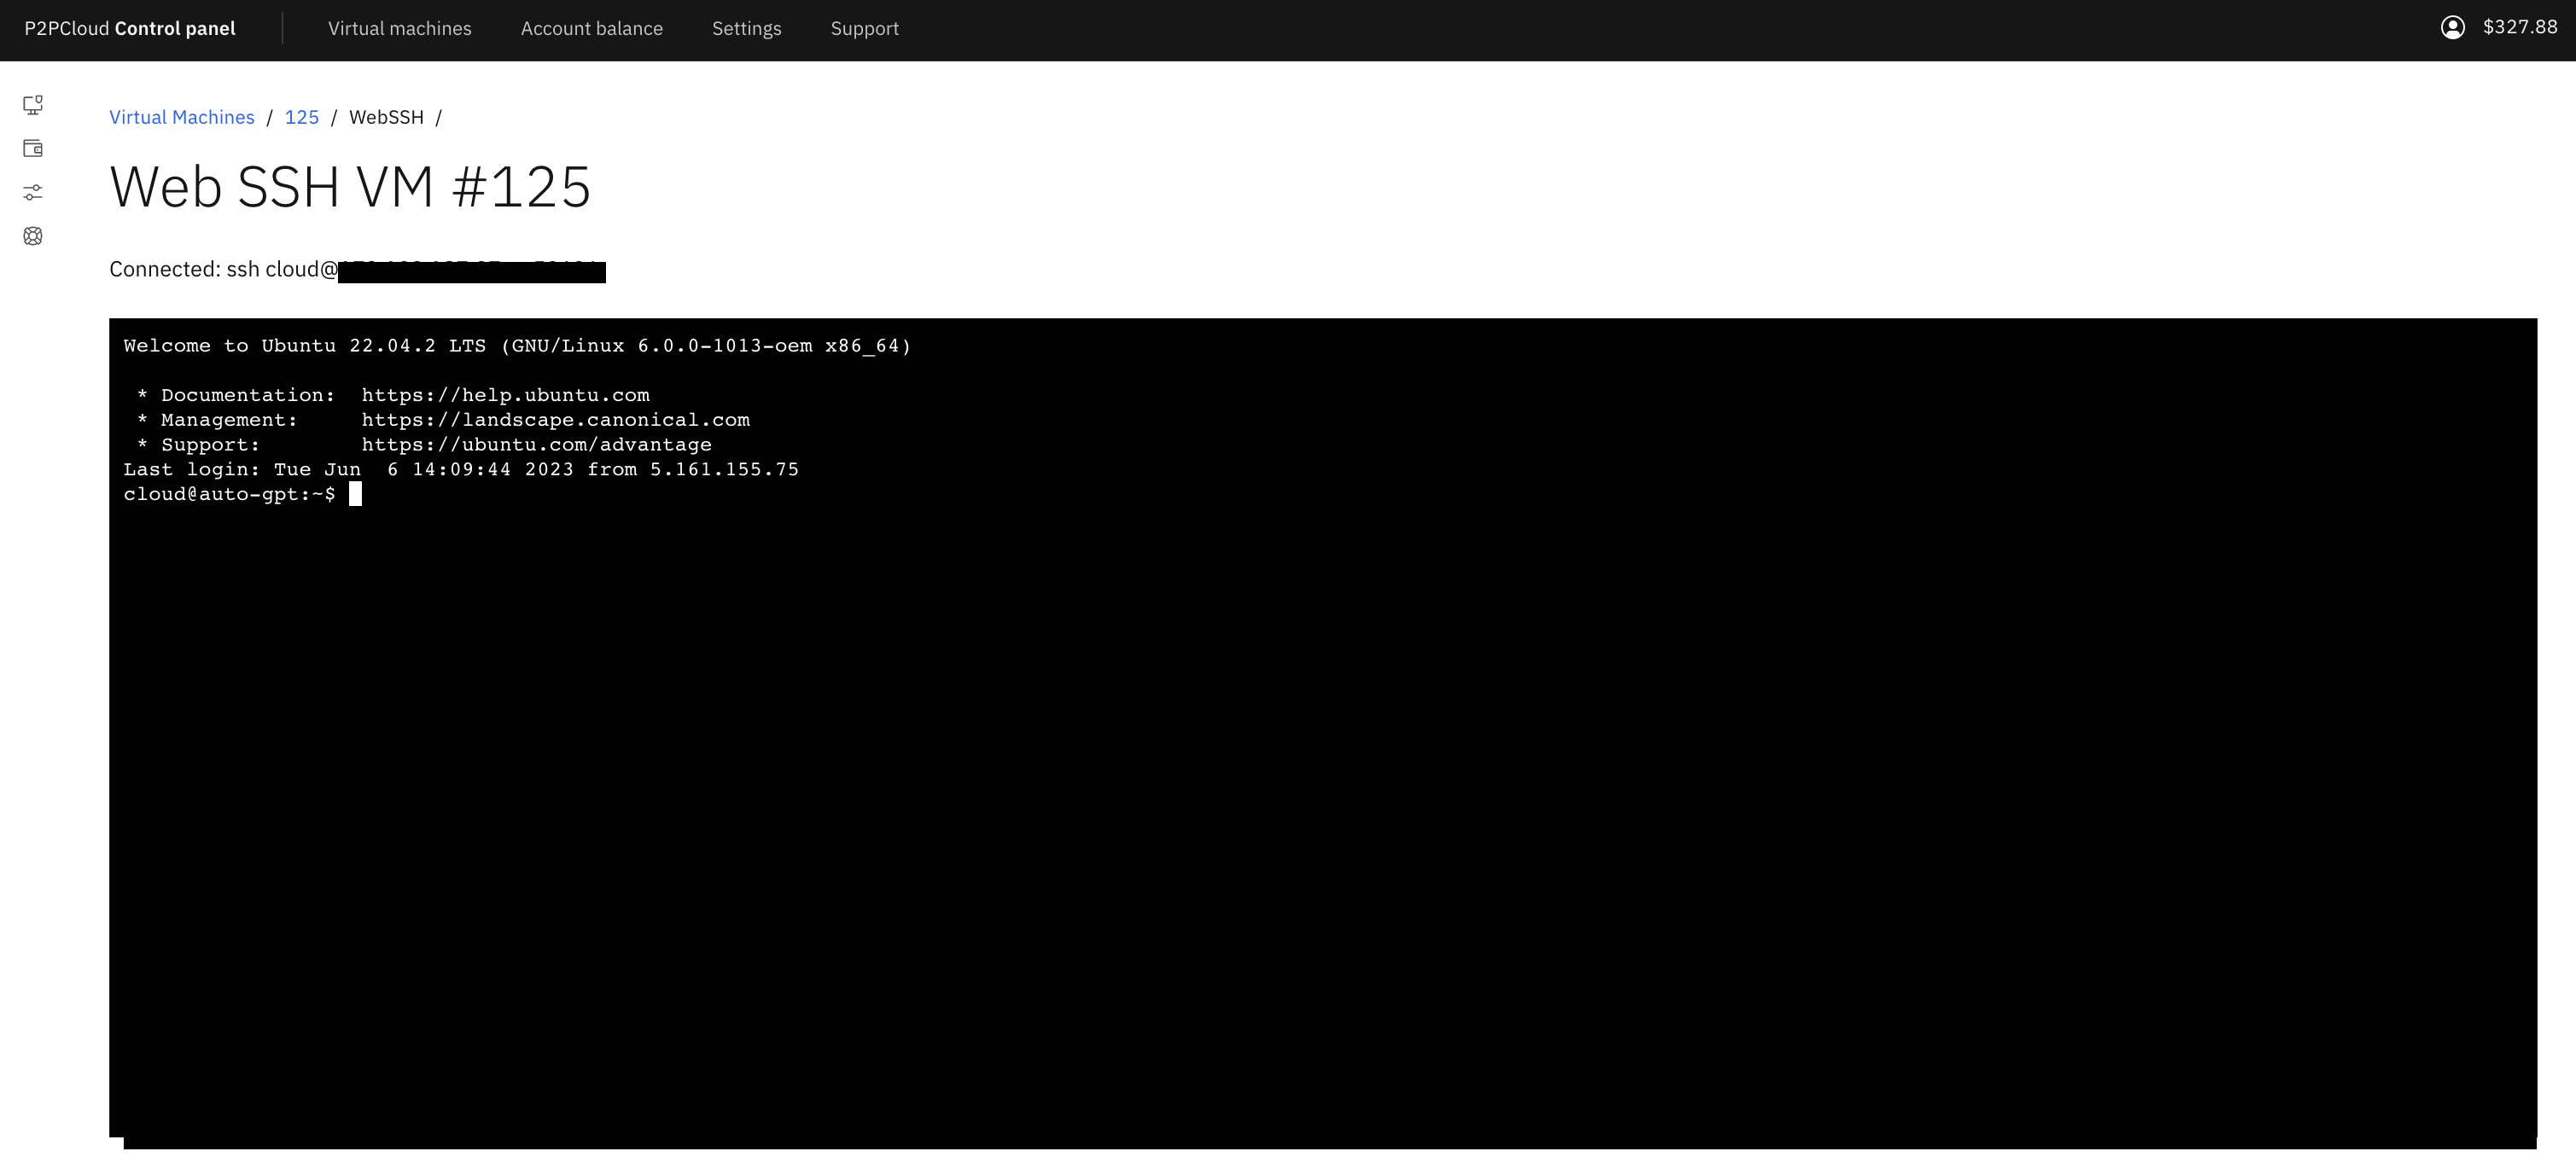
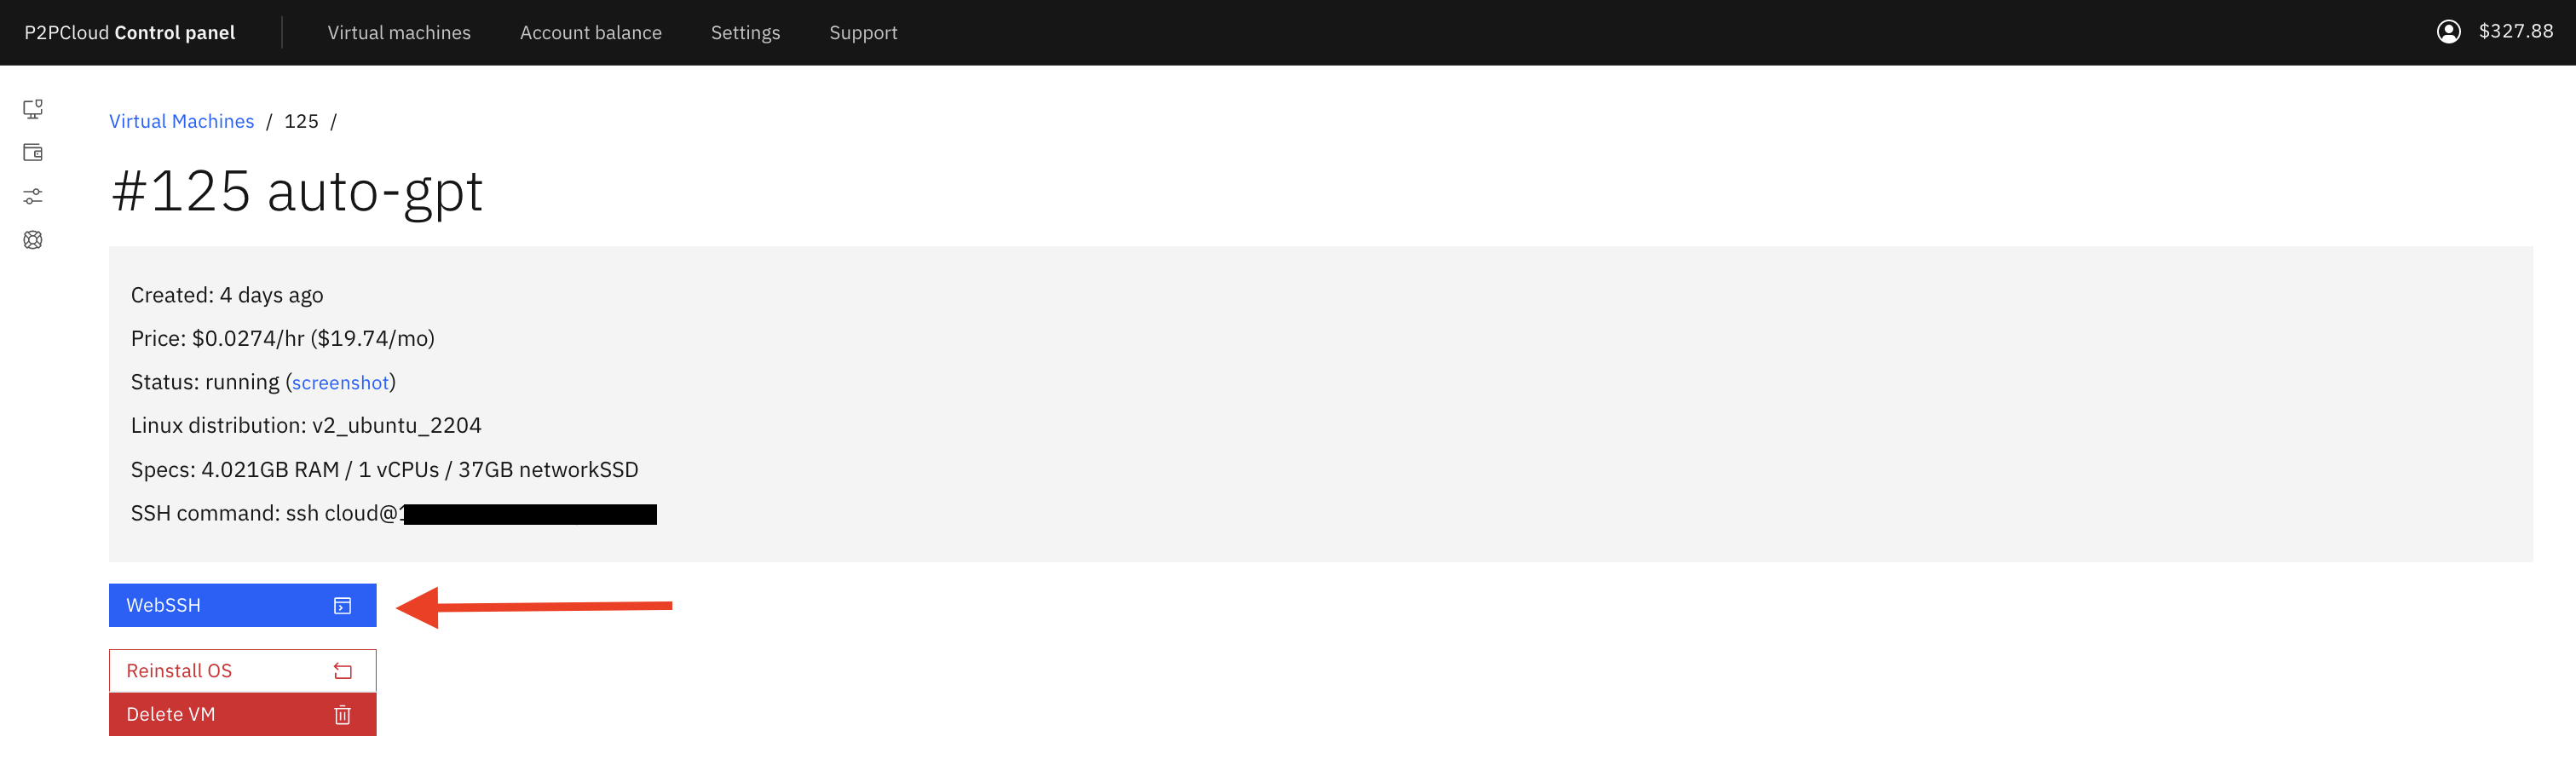
4. SSH Into Your VM via WebSSH
At this point, you are now ready to SSH into your VM through your browser.
To do so, navigate to the Virtual Machine page to see your booked VM. Select your new VM and click on “WebSSH”.